So, you’ve written a great song using prosody, and you even wrote the music for it or had a friend join you on the guitar or piano. You want to copyright it, but you need to record it to do so. Also, if you make your recording high enough quality, you may want to consider sharing it with the world. If you’re new to the music world, I’m going to share some basic ways to help you record your material. The digital age has made recording so affordable and so simple, that even the basic novice has the ability to make a decent record.
Making a recording on your phone
When I’m writing a song, the first thing I do is record a demo version for myself on my phone. There are a number of phone applications that will let you do this. I currently carry two: GarageBand, and MTSR (Multitrack Song Recorder.)
GarageBand gives you a variety of instrumentation to experiment with. However, it is not as simple and user friendly. If you are old school like me and remember the analog days of recording on reel-to-reel tape, you’ll probably prefer MTSR.
MTSR uses only one face, and you just layer track over track, adding instruments one at a time. Since I play everything in a band and don’t use digital instruments, I prefer the simplicity of MTSR. I’m sure there are better applications out there, but since I’m not planning on letting anyone hear my phone recordings but me, it works fine. It allows me to lay down guitar, lay down vocals, and then try an option of guitar leads, bass, mandolin, harmonica, etc. with the ease of pressing record. The best part about it is that it’s free. If I wanted to use one of those tracks, exporting to a wav file is simple. And yes, you can use the recordings you’ve made on your phone to send in for the copyright if you wanted to.
Making a DIY studio recording
Once I get an idea of how I want my song to sound for the public to hear, I usually go to my real, home studio. While there are recording studios available for hire in pretty much any major city, a decent one will cost you a pretty penny. If you’re not aiming for a professionally produced studio recording with Lauren Daigle quality, and you’re willing to learn the tricks of the trade, you can produce a decent recording to sell or share with your friends right at home. I used to spend thousands of dollars on recordings at good studios back in the day, and yet the sound can’t compare to what my little studio produces today. It is a matter of educating yourself and learning the art of recording. There are YouTube videos and tutorials at sites like Lynda.com. Even the software sites have tutorials.
The first piece of hardware you need is a decent computer that can handle multitracking. Most modern computers can. I used to be a PC guy, but now that I’ve switched to Mac, I will never go back. I currently use a MacBook Pro.
The next thing you need is an audio interface, which is an input device for your microphones or instruments. For home recordings, what’s hot right now is the Universal Apollo. You can get it to connect via USB or Thunderbolt. If you don’t want to start with the best and want something more affordable, there are a number of other options, such as the Focusrite Scarlett or the M-Audio MTrack. I chose the M-Audio interface because it is easy to use, affordable, and came with Cubase software. Most of these interfaces come with a software key.
The next thing to look at is software for recording and mixing—and one that is compatible to your audio interface device. What’s hot is always changing. Today’s most popular software becomes uncool in five years, while something else takes the trendy lead. When I started, Cubase was the top software. Then, ProTools became the hot industry standard. I learned both. Shortly after, it was Logic, and now it’s Ableton Live.
In my honest opinion, I would say, don’t follow the trend, follow what works best for you, personally. If you are an audio guy who used to work on live soundboards, ProTools or Cubase is going to feel a lot more comfortable to you. But in all reality, it truly depends on your audio interface. Some interfaces only work with certain software, so I would suggest researching what interfaces and what software you are interested in.
Other hardware you’ll need to include is a microphone for singing. There are several kinds of vocal microphones, but you truly only want to choose between two: dynamic and condenser. Condenser microphones need power, but your audio interface should provide that. Condenser microphones are usually better with home recordings. You’ll also need a cable that goes from the microphone to the audio interface, called an XLR cable. If you are going to plug instruments directly into the audio interface, you’ll need a quarter-inch instrument cable, but I often use the condenser mic for instruments as well. And don’t forget a microphone stand.
Your final piece of the puzzle is a way to listen to your work. You can’t rely on the built-in speakers of your computer. You either need to get studio headphones that completely cover your ear, such as the Audio Technica ATH-M30x, or buy studio speakers, which will run you 3x as much.
If you are new to recording and want something truly affordable, there are a number of turn-key starter packs for home studios available, such as the Focusrite studio pack that comes with the audio interface, microphone, cable, and headphones. The only thing needed is the mic stand. If you live close enough to a major chain music store such as the Guitar Center or Sam Ash, they have qualified sales reps who will direct you to the right studio gear, and sometimes they’ll even have studios set up to sample.
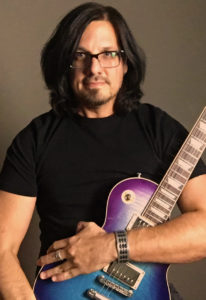
Matthew Hawk Eldridge is a coffee addicted, sleepless, Renaissance man. When he’s not passionately penning screenplays or novels rich in musical history, he’s writing songs on his guitar or working on a film as an actor, musician, double, or stand-in. He holds an MFA in Creative Writing. His album, Overcome, releases Spring 2019.


No Comments